
Self hosted Drone CI for Rails apps


Requirements
- A server running a linux distro
- Nginx installed
- Docker and docker-compose installed
Step 1: Creating a github OAuth application
Go to github.com and go to the settings page

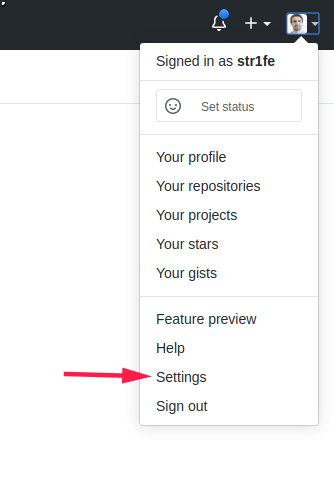
Then click on developer settings

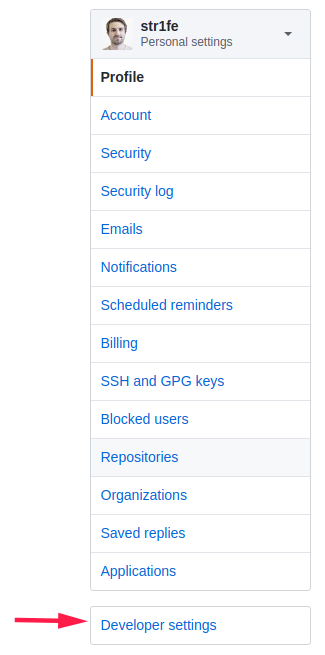
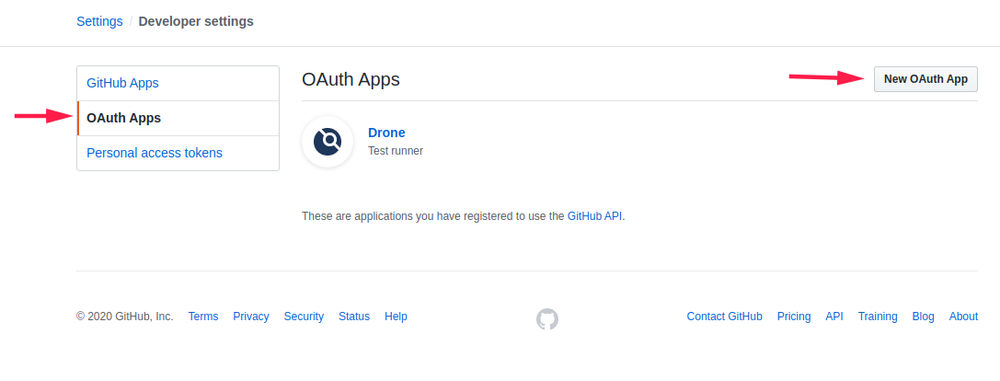
Then click on OAuth Apps and New OAuth App

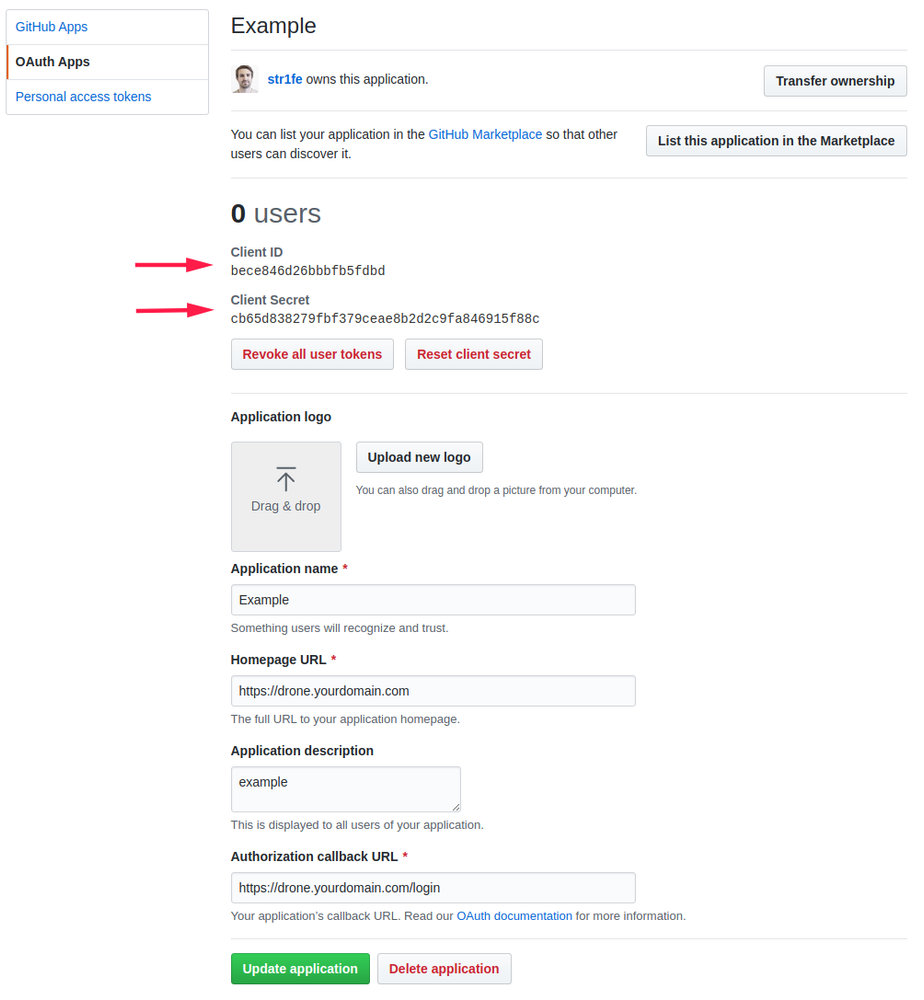
Fill in your information and make sure to set the callback url to whatever domain you choose to use for your ci-box. Make sure to set the path to /login like in the picture.

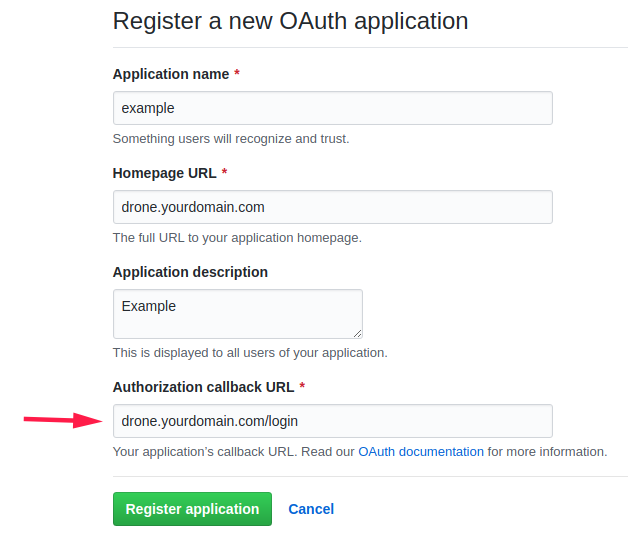
Now copy id and secret to a notepad. We need to use them later

Step 2: Setting up drone
SSH to your server create the folder and files we need:
$ mkdir /etc/drone
$ touch docker-compose.yml server.evn runner.env
Then edit docker-compose.yml with your favorite text editor and paste snippet below
/etc/drone/docker-compose.yml:
version: '3'
services:
  drone:
    container_name: drone
    image: drone/drone:1
    ports:
      - 127.0.0.1:8000:80
    volumes:
      - /var/lib/drone:/data
    restart: always
    env_file:
      - /etc/drone/server.env
  drone-runner:
    container_name: drone-runner
    image: drone/drone-runner-docker:1
    restart: always
    depends_on:
      - drone
    volumes:
      - /var/run/docker.sock:/var/run/docker.sock
    env_file:
      - /etc/drone/runner.env
Edit server.env and add the following (we will edit more later):
/etc/drone/server.env:
DRONE_GITHUB_CLIENT_ID=
DRONE_GITHUB_CLIENT_SECRET=
DRONE_RPC_SECRET=
DRONE_SERVER_HOST=drone.yourdomain.com
DRONE_SERVER_PROTO=https
DRONE_USER_CREATE=username:YOUR GITHUB USERNAME,admin:true
Add DRONE_GITHUB_CLIENT_ID and DRONE_GITHUB_CLIENT_SECRET from your notepad (remember i made you copy these from step 1?).
For DRONE_RPC_SECRET you can generate a key like this:
$ openssl rand -hex 16
bea26a2221fd8090ea38720fc445eca6
In this case DRONE_RPC_SECRET will be set to bea26a2221fd8090ea38720fc445eca6, but use the one YOU generated using the openssl command above.
Replace DRONE_SERVER_HOST with your own domain, and add your github username to DRONE_USER_CREATE and you're done editing this file.
Next file is runner.env
/etc/drone/runner.env:
DRONE_RPC_PROTO=https
DRONE_RPC_HOST=ci.yourdomain.com
DRONE_RPC_SECRET=
DRONE_RUNNER_CAPACITY=20
DRONE_RUNNER_NAME=${HOSTNAME}
Replace DRONE_RPC_HOST with your domain, and DRONE_RPC_SECRET with the same secret you created above with the openssl command. In this case it will be bea26a2221fd8090ea38720fc445eca6, but you have to use the one you generated.
Systemd service
Create a systemd service by creating the file /etc/systemd/system/drone.service:
[Unit]
Description=Drone server
After=docker.service nginx.service
[Service]
Restart=always
ExecStart=/usr/local/bin/docker-compose -f /etc/drone/docker-compose.yml up
ExecStop=/usr/local/bin/docker-compose -f /etc/drone/docker-compose.yml stop
[Install]
WantedBy=multi-user.target
Step 3: setting up nginx
Create the file file /etc/nginx/sites-available/drone:
upstream drone {
    server 127.0.0.1:8000;
}
map $http_upgrade $connection_upgrade {
    default upgrade;
    ''      close;
}
server {
    server_name drone.yourdomain.com;
    root /var/www/ci.example.com/html;
    index index.html index.htm;
    location / {
        proxy_set_header X-Forwarded-For $remote_addr;
        proxy_set_header X-Forwarded-Proto $scheme;
        proxy_set_header Host $http_host;
        proxy_pass http://127.0.0.1:8000;
        proxy_redirect off;
        proxy_http_version 1.1;
        proxy_buffering off;
        chunked_transfer_encoding off;
     }
}
Create a symlink from sites-available/drone to sites-enabled/drone:
$ ln -s /etc/nginx/sites-available/drone /etc/nginx/sites-enabled/drone
SSL
Follow this guide to add ssl certificate with certbot
Step 4: starting drone
To start drone you can run the following command
$ sudo systemctl start drone
# Run status after to make sure it's up and running
$ sudo systemctl status drone
# You may have to restart nginx
$ sudo systemctl restart nginx
You should now be able to visit the drone gui in you web browser by going to your domain drone.yourdomain.com if you've set it up correctly. Remember to create a DNS a record to point to you server's ip address.
You will be asked to authorize with your github account, and from there you can search and add your rails repo from the drone gui
Step 5: creating you first .drone.yml in a rails app
In the root of you rails project create a file called .drone.yml.
In a typical rails project the .drone.yml should look something like this:
kind: pipeline
type: docker
name: default
  steps:
  - name: build
    image: circleci/ruby:2.6.3-node-browsers-legacy
    commands:
      - sudo rm config/database.yml
      - sudo mv config/database.yml.ci config/database.yml
      - sudo -E bundle install --path /bundle --without production,development
      - sudo -E bundle exec rails db:create RAILS_ENV=test
      - sudo -E bundle exec rails db:schema:load RAILS_ENV=test
      - sudo -E bundle exec rspec spec
    volumes:
      - name: gem-cache
      path: /bundle
      - name: tmp
      path: /drone/src/tmp
    environment:
      RAILS_ENV: test
      POSTGRES_USER: postgres
      POSTGRES_PASSWORD: postgres
      DATABASE_HOST: database
      PARALLEL_TEST_PROCESSORS: 15
services:
  - name: database
    image: postgres
    environment:
      POSTGRES_USER: postgres
      POSTGRES_PASSWORD: postgres
      POSTGRES_DB: autostat_test
volumes:
  - name: gem-cache
    host:
      path: /tmp/cache
  - name: tmp
    temp: {}
I based it on circleci's ruby images. They have some of the dependencies needed pre installed, like node. I recommend you create your own docker image based on the official ruby images.
Circleci's images does not run as the root user, so you have to sudo every command, which is not optimal, but it's an easy way to get started.
You should create your own ruby docker image with yarn and other dependencies you might need pre installed. If you're not familiar with docker you can add the commands to install whatever dependencies you need at the top of the commands list, but this will make your tests run slow since it will install dependencies on every run.
For the .drone.yml example above you ned to create config/database.yml.ci
test:
  adapter: postgresql
  encoding: utf8
  host: <%= ENV['DATABASE_HOST'] %>
  username: <%= ENV['POSTGRES_USER'] %>
  password: <%= ENV['POSTGRES_PASSWORD'] %>
  database: <%= ENV['POSTGRES_DB'] %>
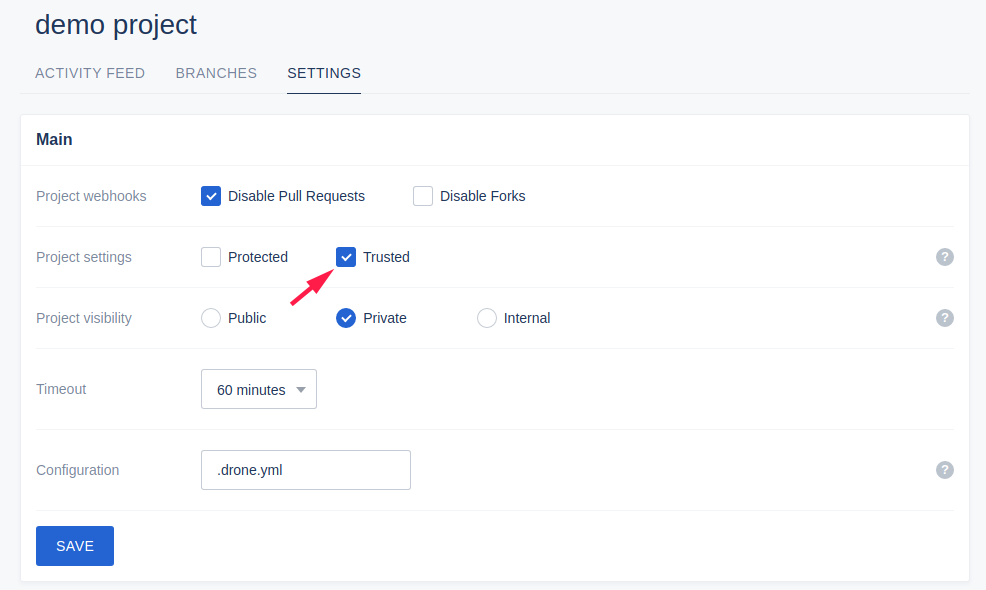
One more thing you need to do is set your repository as «trusted» in the drone gui. This is to allow caching of gems between each ci run (do not do this for public repos. It has security implications).

Thats pretty much it! Everytime you push to github drone will now automatically run your tests.
Sources
This blog post by Erik Samuelsson was very helpful and this blog post is heavily inspired by his solution.